TIG Welding Tips and Tricks for Cleaner Welds
TIG welding tips and tricks for cleaner beads, from tungsten prep and gas coverage to torch angle, filler feed, and puddle control.

On this page
Top picks at a glance
As an Amazon Associate I earn from qualifying purchases.
- 1
 ARCCAPTAIN E7018 Welding Rods 1/8" 5LB Low Hydrogen Carbon9.5/10View on Amazon
- 2
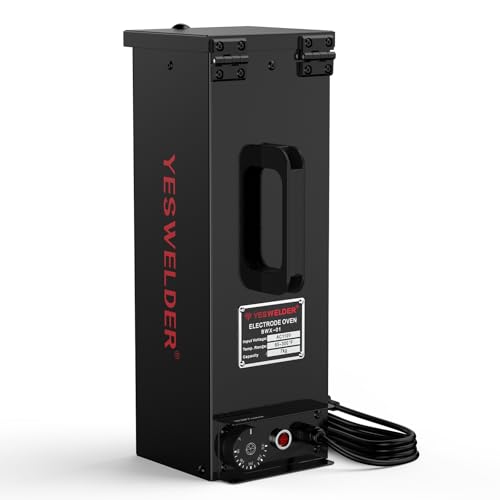 YESWELDER 15lb Welding Rod Oven 110V Temperature Controlled9.5/10View on Amazon
- 3
 ATLASWELDER 6013 Welding Rod 1/8" 10LB9.5/10View on Amazon
The joint is fit up, the tungsten is ground to a point, and the bead still comes out grey, lumpy, and full of holes. TIG welding tips and tricks fix that by working through the chain that makes a clean bead: a clean tungsten, gas that stays on the puddle, a tight arc, and filler fed at the leading edge. The tips below take each habit in turn, from tungsten prep to the finished bead.
This guide links to our product roundups, where WeldGearLab gets a commission on purchases made through links on this page, and your price stays the same. Read our affiliate disclosure.
TIG welding tips and tricks in short
A few habits decide most TIG beads: grind the tungsten clean, keep gas on the puddle, hold a tight arc, feed filler at the leading edge, and move at a steady pace. The rest of this guide takes each habit in turn, with what to watch in the puddle and what to change when the bead goes wrong.
Grind the tungsten clean
Start with the tungsten. Grind it to a clean point on a wheel kept for tungsten, and grind lengthwise so the lines run along the rod, not around it. A blunt tip wanders, and a dirty tungsten spits metal into the puddle. When the tip touches the puddle or the filler, stop and regrind it: a contaminated tungsten never cleans itself by welding on. Keep a spare ground and ready so a touch does not end the session. The TIG welder tungsten tips guide covers prep in more depth, and the tungsten electrode types guide explains the colors.
Keep gas on the puddle
Shielding gas keeps air out of the molten puddle, and air is what turns a bead grey and porous. Hold the cup close enough that the gas covers the puddle and the hot bead behind it, and keep the torch over the bead for a beat after you stop so the tail cools under gas. Wind and drafts pull gas away, so block the breeze or move the work out of it. A glass cup lets you see the puddle through the cup while you weld, and the ARCCAPTAIN kit (on Amazon) lists 6 glass cups in size #12 among its 71 pieces. Cup size matters too: see the TIG welding cup sizes guide.
Hold a tight, steady arc
Arc length sets the heat and the control. Hold the tungsten close to the work so the arc stays short and the puddle stays small and readable. A long arc spreads heat, wanders, and hisses, and it makes the bead wide and flat. Watch the puddle edge, not the arc light: the edge tells you when the metal is ready for filler. If the arc wanders, check the tungsten point first, then the cup and the gas.
Feed filler at the leading edge
Add filler at the leading edge of the puddle, where the metal is molten and ready to take it. Dip the rod in and out of the puddle edge with a steady rhythm, and keep the rod end inside the gas shield so it does not oxidize between dips. Shoving the rod through the arc melts it into balls that drop into the bead cold. Match the rod to the joint: a rod that is too heavy for the puddle floods it, and a rod that is too light starves it.
Good habits side by side
| Do this | Skip this | Why it matters | |
|---|---|---|---|
| Tungsten | Grind a clean point, lengthwise | Welding on a dirty tip | A dirty tip wanders and spits |
| Gas | Keep the cup over the puddle until it cools | Pulling the torch away while the bead is hot | Hot metal pulls in air and goes porous |
| Arc | Hold a tight arc and watch the puddle edge | A long arc that wanders and hisses | A long arc spreads heat and loses control |
| Filler | Feed the rod at the leading edge | Shoving the rod through the arc | Rod through the arc balls up and drops cold |
| Travel | Move steady and let the puddle fill the joint | Rushing the bead or stopping mid-joint | Stops and rushes leave lumps and gaps |
The table above pairs each habit with the mistake that undoes it. When a bead goes wrong, find the row that matches what you see, and change the habit in the first column before touching the machine settings.
Check the torch consumables
Tips fail when the torch is worn out. The ARCCAPTAIN kit fits WP-17, WP-18 and WP-26 torches and packs 71 pieces: 6 glass cups in size #12, 10 gas nozzles, 4 collet bodies, 4 stubby gas lenses and 3 back caps, with pure copper parts. The kit states conductivity similar to a 2% thoriated tungsten electrode at either AC or DC, so the parts carry current the way the tungsten does. Its insulator rings do not match the CK torch, so check fit before ordering. Check the cup, collet and lens before a session, and swap any part that is cracked, clogged or burned. The kit carries a 3 months warranty, and its box measures 11.8 by 5.9 by 1.18 inches. See the parts of a TIG welder guide for what each piece does.
For the machine itself, see the best TIG welder guide and the best welder for beginners guide.
Arc flash, fumes, and fire. TIG throws ultraviolet light that burns eyes and skin, and the arc and hot metal throw sparks that light dry material. Wear a welding helmet and cover skin, weld with ventilation or outdoors with your head out of the plume, and clear flammable material from the area. Chain gas cylinders upright.
For more options, see our guides guides.
FAQ for welders
What tungsten should a beginner start with?
Start with a tungsten that grinds to a clean point and holds it, and grind lengthwise on a wheel kept for tungsten. A 2% thoriated tungsten is the comparison the ARCCAPTAIN kit uses for conductivity, but any tungsten that stays clean and sharp works for learning. When the tip touches the puddle, regrind it before the next bead.
Why is my TIG bead grey and porous?
Grey and porous beads mean air reached the puddle. Keep the cup over the puddle until it cools, block wind and drafts, and check the cup and gas lens for damage. A dirty tungsten also spits metal into the puddle, so regrind it and try the bead again.
How to stop dipping the tungsten?
Hold a tight arc and watch the puddle edge, not the arc light, so you see the gap between the tungsten and the metal. Feed filler at the leading edge with a steady rhythm instead of reaching across the puddle. Keep a spare tungsten ground and ready, so a touch costs a swap instead of a session.
Does a beginner need a gas lens for TIG?
A gas lens steadies the gas flow and covers the puddle better than a plain collet body, which helps on long beads and in a breeze. The ARCCAPTAIN kit includes 4 stubby gas lenses and 4 collet bodies, so you can compare them on the same torch. Either works for learning; the lens earns its place when coverage gets hard.
Can a beginner TIG weld aluminum?
Yes, with AC TIG and clean metal, though aluminum is harder to learn on than steel because it conducts heat away fast and shows no color change before it melts. Learn the bead on steel first, then move to aluminum with the AC setting your machine manual calls for. The AC TIG vs DC TIG welder guide explains the difference.
What consumables belong in a TIG kit?
Keep cups, collets, gas lenses and back caps for your torch, plus spare tungstens ground and ready. The ARCCAPTAIN kit packs 71 pieces for WP-17, WP-18 and WP-26 torches, with 6 glass cups in size #12, 10 gas nozzles, 4 collet bodies, 4 stubby gas lenses and 3 back caps. Check the cup, collet and lens before each session and swap worn parts.
Related: best TIG welder, best welder for beginners, best entry-level TIG welder, and the TIG welders hub.