How to Use a Shrinker Stretcher: Step-by-Step Metal Forming Guide
Learn how to use a shrinker stretcher to form curved sheet metal flanges, control jaw pressure, and shape smooth panels for auto body and fabrication work.

On this page
Top picks at a glance
As an Amazon Associate I earn from qualifying purchases.
- 1
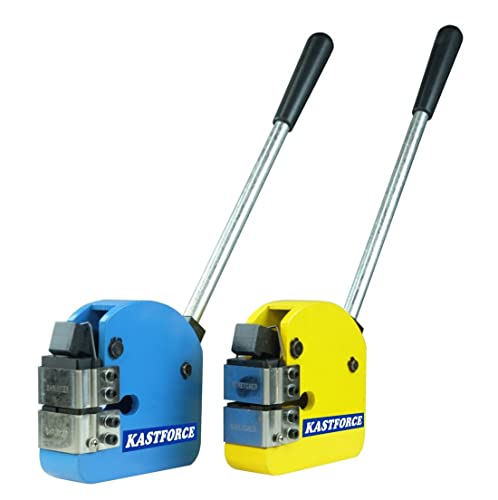 KASTFORCE KF5005 Metal Shrinker and Stretcher ComboView on Amazon
- 2
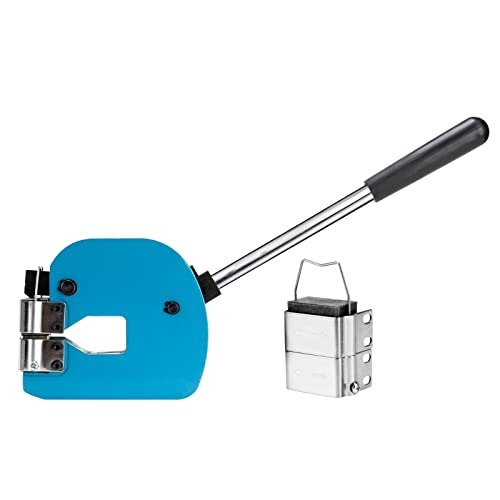 Globauto 2-in-1 Metal Shrinker and StretcherView on Amazon
- 3
 Metal Shrinker Stretcher Combo Set, 1-Inch ThroatView on Amazon
- 4
 KAKA Industrial FSM-16 Shrinker Stretcher with StandView on Amazon
When shaping a curved patch panel, wheel arch contour, or rust repair flange on the fab bench, learning how to use a shrinker stretcher gives you precise control over sheet metal contours. You use a shrinker stretcher by inserting a sheet metal edge or formed flange between the hardened jaws and applying steady lever or pedal pressure to compress or stretch the metal in small, overlapping passes. Compressing the edge with the shrinker pulls the workpiece into an inside concave curve, while expanding the edge with the stretcher forces it outward into an outside convex curve.
Other welders and gear to compare
 KASTFORCE KF5005 Metal Shrinker and Stretcher ComboCheck price on Amazon
 Globauto 2-in-1 Metal Shrinker and StretcherCheck price on Amazon
 Metal Shrinker Stretcher Combo Set, 1-Inch ThroatCheck price on Amazon
 KAKA Industrial FSM-16 Shrinker Stretcher with StandCheck price on Amazon
This guide links to our product roundups, where WeldGearLab gets a commission on purchases made through links on this page, and your price stays the same. Read our affiliate disclosure.
The difference in one paragraph
A straight standing flange prevents a sheet metal panel from curving across its face. A shrinker uses serrated clamping jaws that squeeze the metal and slide inward, compressing the metal grain structure and shortening the edge of the flange. A stretcher uses opposing jaws that clamp and slide apart, lengthening the edge. Shortening the flange curls the adjoining sheet into an inside concave radius, while lengthening the flange drives it into an outside convex radius.
Side by side
| Shrinker Jaws | Stretcher Jaws | Dual-Jaw Stand | |
|---|---|---|---|
| Jaw motion | Clamps and slides inward to compress metal | Clamps and slides outward to expand metal | Houses independent shrinking and stretching jaws |
| Curvature effect | Shortens edge to form inside concave curve | Lengthens edge to form outside convex curve | Allows immediate switching between concave and convex curves |
| Typical fabrication | Inner wheel tubs, concave flanges, inside corners | Fender flares, convex lips, outer perimeter curves | Complex patch panels requiring alternating curve passes |
| Control type | Hand lever or single foot pedal | Hand lever or single foot pedal | Dual independent foot pedals with spring return |
| Surface marks | Leaves compression bite marks on the flange face | Leaves expansion bite marks on the flange face | Leaves standard bite marks from the active jaw station |
| Corrective action | Reverses an over-stretched section | Reverses an over-shrunk section | Corrects curve depth instantly without swapping jaw sets |
Shrinker and stretcher jaws share matching exterior dimensions and mount into identical housings, but their internal wedge angles face opposite directions. Lowering the mechanism forces split jaw blocks down angled ramp surfaces. Shrinker wedges slope inward to squeeze the jaw halves together as they bite, while stretcher wedges slope outward to spread the halves apart under load. Fabricators often alternate between both jaws to balance edge tension and dial in final contours.
When to use the shrinker
- Inside curved flanges. Forming concave contours for inner wheel tubs, door recesses, and window aperture flanges.
- Removing excess puckers. Compressing material when wrinkles develop along hammer-formed edges.
- Curving straight flanges. Shortening the flange perimeter so the adjacent sheet face pulls inward into a concave sweep.
- Correcting over-stretched work. Running quick shrinking passes over areas where stretching expanded the metal too far.
Before shrinking, prepare clean sheet blanks without ragged edges that can crack under jaw pressure. For cutting smooth curved panels before forming flanges, see our guide to the best sheet metal nibbler options, or review a metal nibbler for drill cutter for portable panel prep around the shop.
When to use the stretcher
- Outside curved flanges. Lengthening flange edges to bend the sheet face outward into smooth convex profiles.
- Fender flares and outer lips. Spreading an outer panel lip so the perimeter wraps cleanly outward over a tire radius.
- Straightening curved stock. Stretching the short inside radius of an accidentally bent angle piece to bring it back to straight.
- Relieving tight flange tension. Releasing sharp stress concentrations where a pre-bent flange refuses to lay flat.
Stretching flanges works alongside bead rolling when fabricating custom automotive floors and trunk pans. Forming rigid bead profiles can pull outer edges out of alignment, and targeted stretching passes restore flat flange contact. See our guide on how to use a bead roller to coordinate panel stiffening with flange curvature.
How to use a shrinker stretcher
Consistent jaw bite depth and light pressure across multiple overlapping passes produce smooth curves. Follow these shop practices to form clean contours:
- Prepare the edge or flange. For flat trim strips, shear and deburr edges cleanly. For three-dimensional panels, bend a standing flange on a sheet metal brake or forming block, ensuring the flange height fits within the tool’s throat depth.
- Clean the metal surface. Wipe away cutting oils, rust, grit, and mill scale. Lubricants cause serrated teeth to slip, while abrasive scale fouls the tooth pattern.
- Position the metal squarely in the jaws. Slide the workpiece between the jaws, keeping the sheet perpendicular to the jaw face. Tipping the workpiece tilts the jaws and creases the metal.
- Apply firm, moderate pressure. Depress the hand lever or step on the foot pedal until the jaws cycle through their lateral travel. Avoid heavy force, which marrs the workpiece without producing a smoother curve.
- Advance with overlapping bites. Release pressure to let the jaws reset fully. Advance the sheet metal in small increments, overlapping each bite to blend deformation into a sweeping curve.
- Check progress against a template. Frequently compare the panel against a cardboard contour gauge or vehicle opening. If you bend past your layout mark, swap to the opposite jaw set and make light passes to ease the curve back.
Throat depth and stand options
Throat depth determines how wide a flange or panel can reach past the jaw center. Shorter throats keep frames rigid for benchtop work, while deeper throats reach past wide flanges on pre-shaped panels.
Tool listings reflect these throat differences. The Americangaslogs combo (on Amazon) set listing states a 1″ (25.4mm) throat depth with a 20.3 pounds weight. The MRFIOJYDR SS-18FD (on Amazon) listing also states a 1″ deep throat on a 53 pounds floor stand. For wider flanges, the KASTFORCE KF5005 (on Amazon) listing states a 2.5 inch (63mm) throat capacity with a 20.3 pounds weight and 12 months warranty. For deep restoration panels, the Globauto listing states a 90mm (3-1/2″) throat depth with a cast iron body, and the KAKA INDUSTRIAL FSM-16 (on Amazon) listing states a 6 in throat depth on a floor stand with an 84 pounds net weight (132 pounds shipping weight).
Mounting configuration also shapes shop workflow. Benchtop units like the KASTFORCE combo pack (20.3 pounds) and Americangaslogs set (20.3 pounds) bolt to a workbench and use a hand lever, requiring one hand on the handle while the other guides the metal. For larger panels, stand-mounted machines provide hands-free control. The KAKA INDUSTRIAL FSM-16 (84 pounds) features a floor stand with foot pedal operation, while SS-18FD floor machines (listed at 53 pounds by BZPFNDKVG, YUYANSHOP, MRFIOJYDR, and BYOIPLOI, and 53.2 pounds by GUDBYWXB) use spring-loaded dual pedals so both hands can guide large panels while regulating jaw bites by foot.
Sheet metal thickness limits and materials
Exceeding material gauge limits can spring the tool body, chip jaw teeth, or crack the cast housing.
Reference listings state specific material limits. KASTFORCE KF5005, Globauto, and Americangaslogs listings state compatibility with mild steel up to 18 gauge (1.2mm) and aluminum up to 16 gauge (1.5mm). For heavier work, the KAKA INDUSTRIAL FSM-16 listing states mild steel capacity up to 16 gauge (1.5 mm). SS-18FD listings from BZPFNDKVG, MRFIOJYDR, Wtobybt, BYOIPLOI, and GUDBYWXB similarly state an 18-gauge (1.2mm) capacity. Mild steel forms reliably through standard jaws, while aluminum marks more readily under tooth serrations.
Workshop safety and panel fit-up. Handling sheared sheet metal through forming jaws involves sharp edges and mechanical pinch points. Wear cut-resistant leather gloves that maintain dexterity; check our review of the best welding gloves for dexterity for flexible hand protection. Wear safety glasses, as mill scale can dislodge under pressure. Ensure benchtop tools are securely bolted down and floor stands sit flat on solid shop floors so equipment cannot tip.
After shaping flanges to match your frame, dress jaw bite marks with an angle grinder or sanding block before welding. See our review of the best angle grinder picks for surface prep, inspect our guide on the best welder for body panels for repair setups, and follow our recommendations on how to MIG weld thin sheet metal without burning through when fusing thin skins.
FAQ for welders
Can you shrink or stretch flat sheet metal without a flange?
Yes, you can shrink or stretch the edge of a flat strip without a flange to curve it within its own flat plane, which is common for curved trim rings or flat brackets. However, to pull a broader panel into a three-dimensional contour, you must form a standing flange along the edge so that compressing or expanding the flange edge forces the adjacent panel to curve. To crown the center of a wide sheet without edge forming, use an English wheel, mallet and shot bag, or bead roller.
How do you smooth out jaw teeth marks left on the flange?
Serrated jaws leave bite marks on the flange face as they clamp and slide. You can minimize tooth impressions during forming by wrapping masking tape over the jaw faces or taking lighter, more frequent passes. After shaping is complete, level the surface using a medium abrasive disc on an angle grinder, a body file, or a sanding block before priming and painting.
Can one machine shrink and stretch without changing jaws?
Some tools require swapping the jaw blocks inside a single body, while combo sets and dual-head floor stands offer both functions simultaneously. Stand models like the SS-18FD feature dedicated shrinking and stretching jaws mounted side by side with independent foot pedals, allowing you to alternate between shrinking and stretching instantly without tool changes.
What metal thickness can these tools handle?
Capacity depends on the specific machine. Listings for benchtop combo units like KASTFORCE and Americangaslogs, as well as SS-18FD stands, state a capacity of 18 gauge (1.2mm) mild steel and 16 gauge (1.5mm) aluminum. For heavier fabrication, the KAKA INDUSTRIAL FSM-16 listing states a mild steel capacity up to 16 gauge (1.5 mm). Always verify the stated rating in your tool’s manual, as exceeding its capacity can chip the teeth or crack the frame.
Why did my curved panel warp or twist out of plane?
Twisting occurs when the flange is inserted into the jaws at an angle rather than perpendicular, or when clamping pressure is applied unevenly along the strip. To prevent warping, keep the main panel face flat against the jaw mouth during each pass and support the free end of long workpieces so its weight does not twist the flange under load.
Related: metal fabrication tools hub, how to use a bead roller, best sheet metal nibbler, and best welder for body panels. Also see our guide on how to MIG weld thin sheet metal without burning through.